Using Slide Masters, Part One
In this article, we will introduce you to slide masters and how to use them in Microsoft PowerPoint.
For instructor-led PowerPoint training classes in Los Angeles call us on 888.815.0604. Onsite PowerPoint training is available countrywide.
In this article, we will learn how to:
- Open Slide Master view
- Create slide layouts
Opening Slide Master View
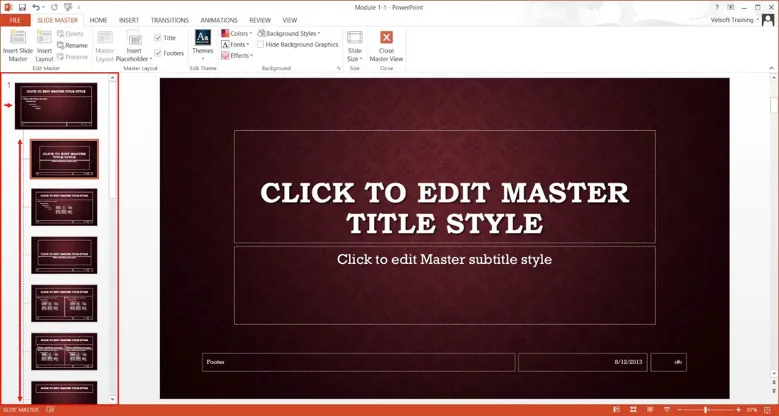
Every PowerPoint presentation contains one or more sets of slide masters that control the layout and appearance of each slide. Using Slide Master view, you can make changes to these slide masters and their related layouts. To open slide master view, click View → Slide Master:

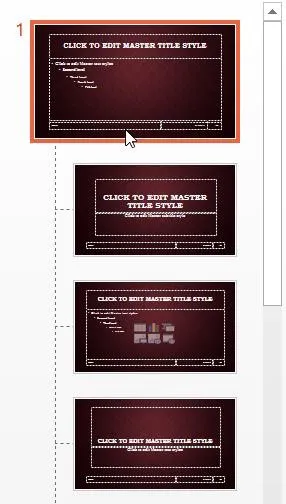
When Slide Master view has been applied, you will see the top-level slide master at the top of the Slides pane, with the related layouts listed below:

In addition to the Slides pane, you will also see the Slide Master tab on the ribbon. This tab contains a number of commands that you can use to modify the master:

Click Slide Master → Close Master View to return to the default PowerPoint view:

Close Microsoft PowerPoint 2013 without saving the changes that you have made.
Creating Slide Layouts
Open Slide Master view by clicking View → Slide Master:

To create a new slide layout using the Slide Master view, first click to select the top-level master that you want the new layout to appear in. For this example, ensure that the top-level slide master is selected:

Next, click Slide Master → Insert Layout:

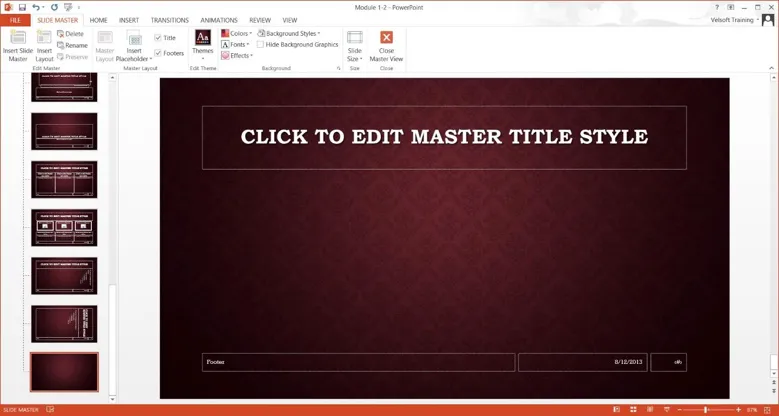
The new slide layout will now appear at the bottom of the Slides pane. This new layout will also be automatically selected and open in the workspace:

As you can see, slide layouts will automatically incorporate the theme elements that were defined in the top-level master. All you need to do is insert placeholders for text, videos, pictures, charts, or other media that you would like this new slide layout to include.
Save the changes that you have made to the presentation and close Microsoft PowerPoint.
