Layer and Group Graphic Objects
In this article, will delve a little deeper into how to layer and group graphic objects together in Excel.
For instructor-led Microsoft Excel training in Los Angeles call us on 888.815.0604..
Once you have added graphical objects to a worksheet, it is important to know how to organize their positioning in relation to one another. Using layers, you can choose which object overlaps another, while grouping allows you to group multiple graphical object together so that you can adjust their properties all at the same time. Over the course of this topic, you will learn all about layering and grouping graphical objects in Microsoft Excel 2016.
Topic Objectives
In this topic, you will learn:
- About layering objects
- About grouping objects
- About positioning objects
Layering Objects
When a graphical object is added to a worksheet, it is added to its own layer so that it can overlap any existing objects. You can manipulate a layer and how it interacts with others by moving it forward or backward in the stack of layers – just like moving the top-most card in a deck below the next and vice-versa. To do this, first click to select the object that you would like to work with and then click Picture Tools – Format (or Drawing Tools – Format) → Bring Forward or Bring Backward:

If you would instead like to move a selected graphical object to the bottom or top of the stack of layers, the Bring Forward → Send to Front, or Send Backward → Send to Back commands can be used:

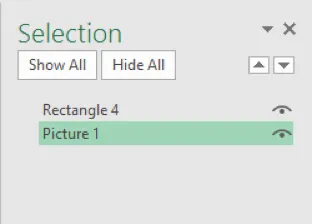
Alternatively, you can view and interact with the various graphical objects that exist on layers within the worksheet by opening the Selection task pane. To do this, click Picture Tools (or Drawing Tools) – Format → Selection Pane:

This task pane will list all of the graphical objects that exist on the current worksheet and how they are currently arranged:

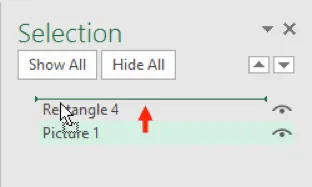
If you would like to change how these objects are arranged, click and drag them around in this list to shift their location:

Grouping Objects
If you would like to work with multiple objects as a group, such as moving them all at the same time, you can group them together. To do this, select each graphical object that you would like to group (hold the Ctrl key while clicking on each object). Next, click Picture Tools – Format (or Drawing Tools – Format) → Group → Group:

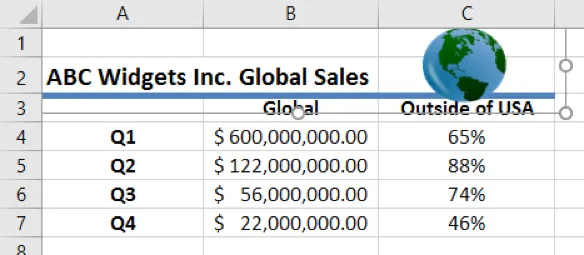
Once two or more graphical objects are grouped together, any changes made to the group will be applied to all of its members – including size, position, and more:

To ungroup any objects that have been grouped together, first click to select the group in question and then click Picture Tools – Format (or Drawing Tools – Format) → Group → Ungroup:

After ungrouping a group, you can quickly reform it by selecting one of the objects that a member of the previous group and clicking Picture Tools – Format (or Drawing Tools – Format) → Group → Regroup.
Positioning Objects
Objects can be positioned in relation to the grid of the worksheet, as well as in relation to other shapes appear on it. You can enable either of these options by clicking Picture Tools – Format → Align → Snap to Grid (or Snap to Shape) while the object that you would like to work with is selected:

