Modifying Page Breaks in Microsoft Word
Word automatically determines where each page of a document should begin and end by inserting automatic page breaks. As you create and edit multipage documents, you might find that you need to manipulate the automatic page breaks. You can quickly create a manual (forced) page break by clicking the Page Break button in the Pages group on the Insert tab.
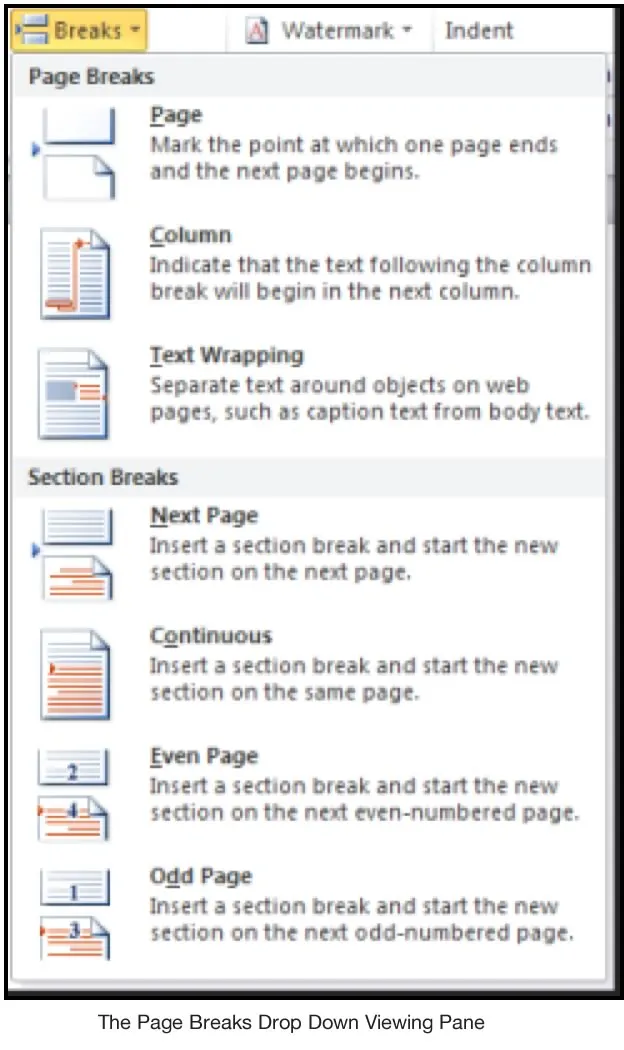
To see more Breaks options, on the Page Layout tab, in the Page Setup group click the Breaks button to see a drop down viewing pane of Page Breaks options and definitions (see Figure below). This subject is covered in more detail in Module 3 of the course.
Manual page breaks override the automatic page breaks created by Word.
For more details about our instructor-led Microsoft Word classes in Los Angeles call us on 888.815.0604.

Page breaks are displayed in different ways on your screen depending on which view is activated.
When your document is displayed in Print Layout view, both types of page breaks, automatic and manual, are indicated by the separation of each page in the document window.
When your document is displayed in Draft view, automatic page breaks are indicated by a single horizontal line across the page, and manual page breaks are indicated by a single horizontal line with the words Page Break in the centre of the line.
If you want to delete a manual page break, display the document in Draft view first.
Method to Modify Page Breaks
To insert a manual page break using the Break dialog box:
- Place the insertion point at the desired location.
- Click the Page Break button in the Pages group on the Insert tab.
To insert a manual page break using the keyboard:
- Place the insertion point at the desired location.
- Press Ctrl+Enter
To change the view of a document:
- On the View ribbon tab, choose the desired view.
To delete a manual page break:
- Make sure the document appears in Draft view.
- Place the insertion point on the manual page break.
- Press Delete
Also see How to Select Text in Word.
