Adding Custom Fields to a Task in Microsoft Project
In this article, we will take a look at how to add Custom Fields to a Task within MS Projects. This article features easy to follow steps which will guide you through adding Custom Fields to an MS Projects Task.
For classes dedicated to Microsoft Project in Los Angeles and delivered by trained instructors, call us on 888.815.0604.
Adding Custom Fields to a Task
A very useful way in which you can customize Project 2013 is through the addition of custom fields. To add a custom field, first right-click any column header within the tasks list. (The new custom field will be added to the left of the header you right-click.) Next, click Custom Fields:
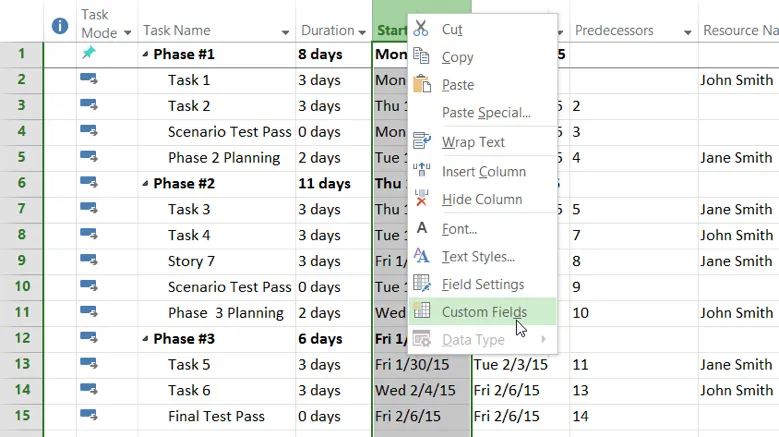
The Custom Fields dialog will now be displayed:
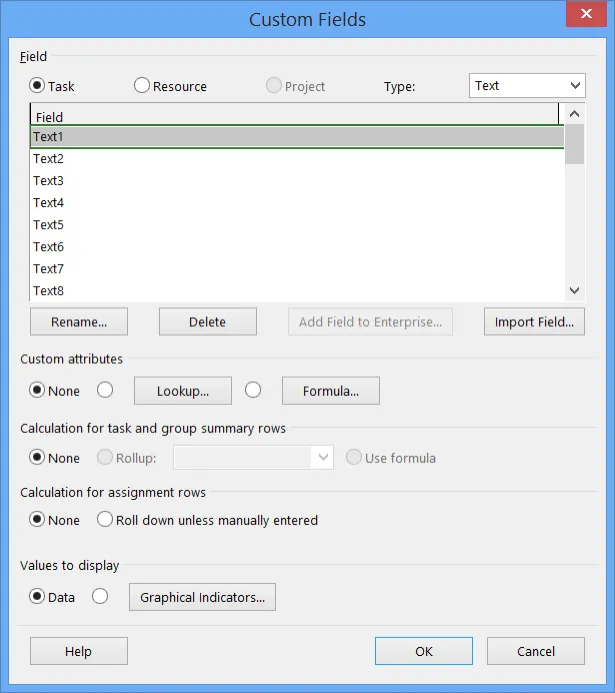
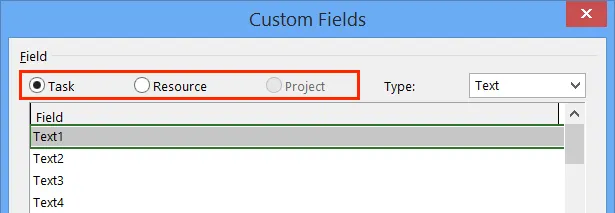
Using the radio buttons at the top of this dialog, you can choose the field category; Task will be selected by default. In the same area, the Type drop-down menu allows you to choose what type of custom field you would like to create. By default this is set to Text, but you have a wide variety of other options to choose from.
Leave these settings unchanged:
Double-click on the field that you would like to add. For this example, double-click “Text1:”
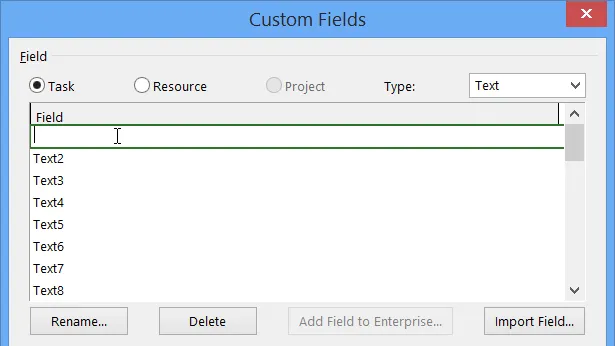
You can now rename this new field. For this example, type “Module 3-4:”
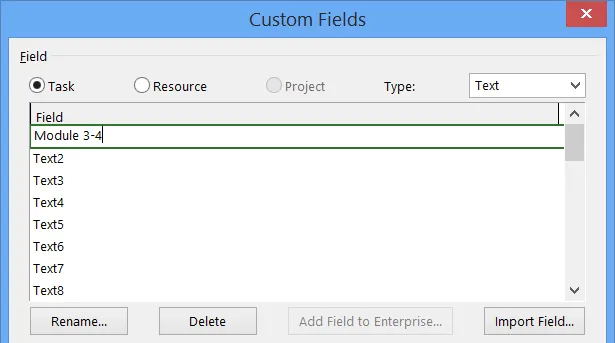
Press Enter on your keyboard to apply this new change.
Further down in this dialog, you have the option of adding custom attributes as well as calculations and values to display:
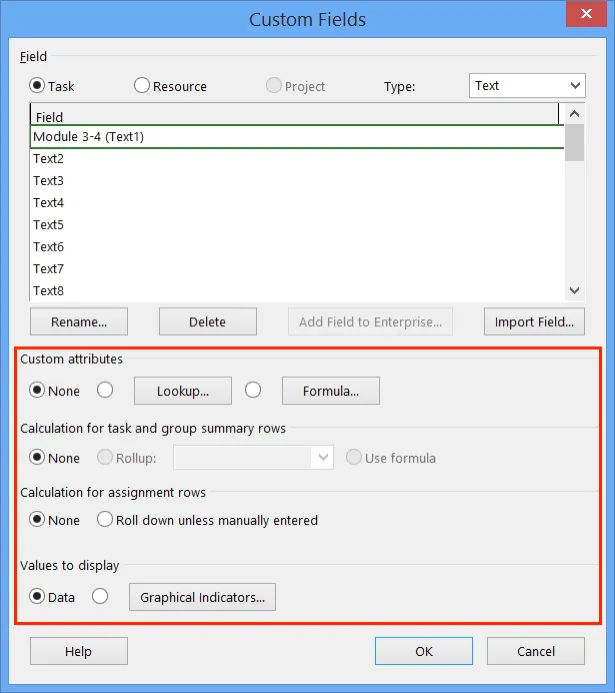
For this example, leave these settings unchanged and click OK to add the new custom field:

Double-click any task in the sample project to open the Task Information dialog. Click to open the Custom Fields tab. You will see the new custom field that you just created listed here:
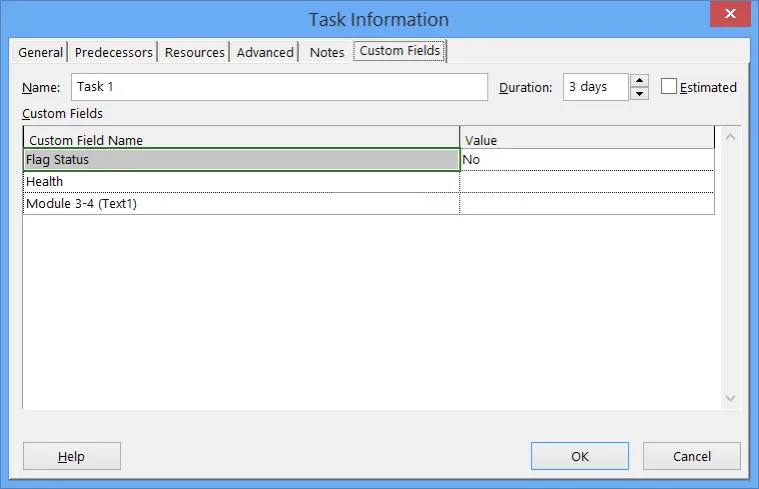
Click OK to close the Task Information dialog and then save the changes that you have made to the current project.
