Changing Font Schemes in Microsoft Word
Are you looking for Microsoft Word training? Training Connection offer onsite training countrywide as well as local Microsoft Word classes in Los Angeles.
Changing Your Font Scheme
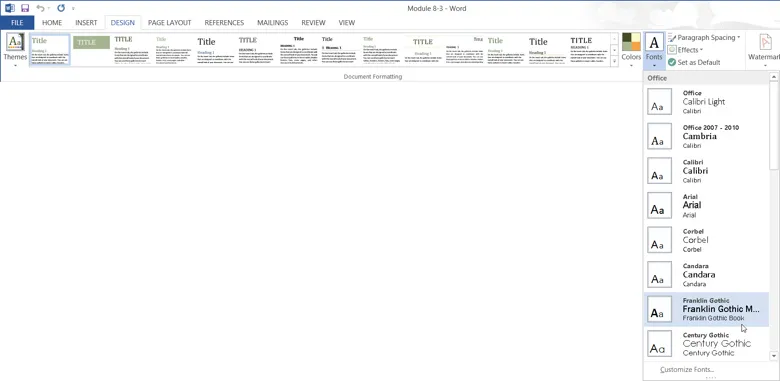
Just as you can change the colors used by the applied style set, you can also change its fonts. Click Design → Fonts:

From this drop-down command there are a variety of font schemes to choose from. Move your cursor over each to see a preview of how they will look once applied to your current document. For this example, click to apply the Franklin Gothic font scheme:

The new font scheme will now have been applied to your current document:

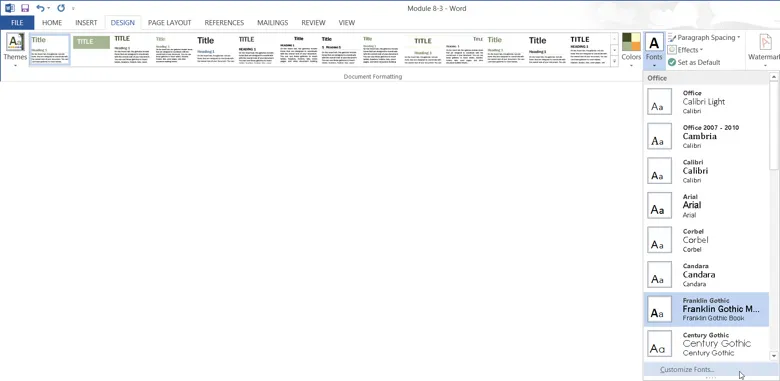
If the default font schemes that are available do no meet your needs, you have the option to create a new one from scratch. Click Design → Fonts → Customize fonts:

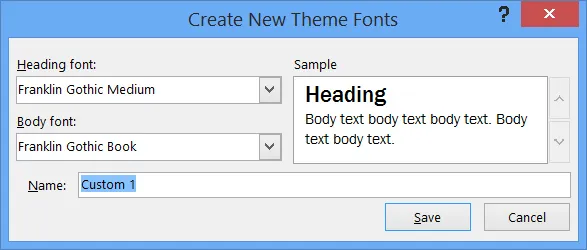
This action will open the Create New Theme Fonts dialog:

Using the two drop-down menus provided on this dialog you can choose a font for both headings and body font types. A preview of how the selected fonts will look once chosen is shown on the right-hand side of this dialog. Once you are ready to save the new font scheme, you would type the name of this font into the Name text box and then click Save. In this case, click Cancel to return to your document.
Making Changes Permanent
After having selected a style set and customized its color and font schemes, you are able to set these settings as the default style settings so that they are automatically used for all new documents. Do this by clicking Design → Set as Default:

A warning dialog will be displayed that will ask you to confirm your choice to change the default style set and theme settings. Normally if you were to continue you would click Yes, but for this example click No:

Be careful when using this command as there is no reset or undo option. The only way to return to the previous default settings is to select them manually and apply them as the new default.
